AUDIO BASICS 101:
Tips & Tricks To Get Great
Voice-Over Narration On A Budget
Guest Post by: Pratik Panda
Audio Basics 101: Are you wondering why some videos have wonderfully rich sound and your audio sounds hollow, tinny and empty?
Having great sound doesn’t necessarily involve tons of
expensive equipment and a fancy studio (although it certainly doesn’t hurt!).
If you’re on a tight budget and looking for great sound, here are a few tips and tricks to help your voice-over narration come alive with warmer tones and intimacy.
What You Need To Get Started
First you will need some decent recording equipment.
For super low-budget audio recording, believe it or not, the voice recorder on your cell phone will give you a much better audio quality than the internal mic on your digital camera and it’s definitely preferable over the mic on your laptop webcam. For a step-up in quality, use a professional digital audio recorder such as the Zoom H5n.
Of course, record your audio in a quiet, contained location so there’s no echo and reverberation. A closet filled with clothes and pillows can be a great DIY audio recording studio!
Next, once you’ve recorded your voiceover, you will need audio software to edit the voice. Audacity is a free audio editor and has everything you need to produce high quality
voiceovers. More professional editors include software like Adobe Audition.
Tips To Improve Voice-Over Sound Quality:
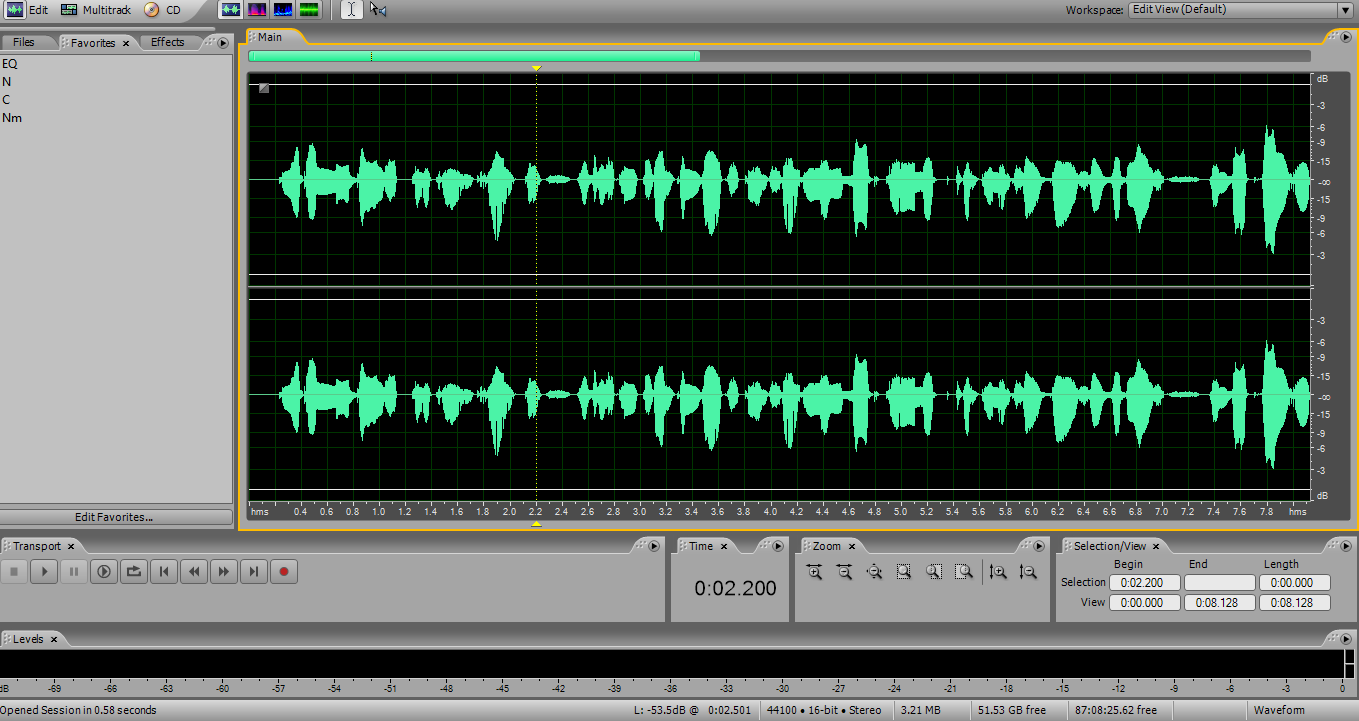
Step 1: Well, you guessed it! You have to open the recording in the software, Adobe Audition, as illustrated in the screenshot below. The recording is preferably in an uncompressed/high quality format like WAV or M4A, also try to aim for a higher sampling rate and sample depth. I personally like 48k/16 bits per sample for my recordings.
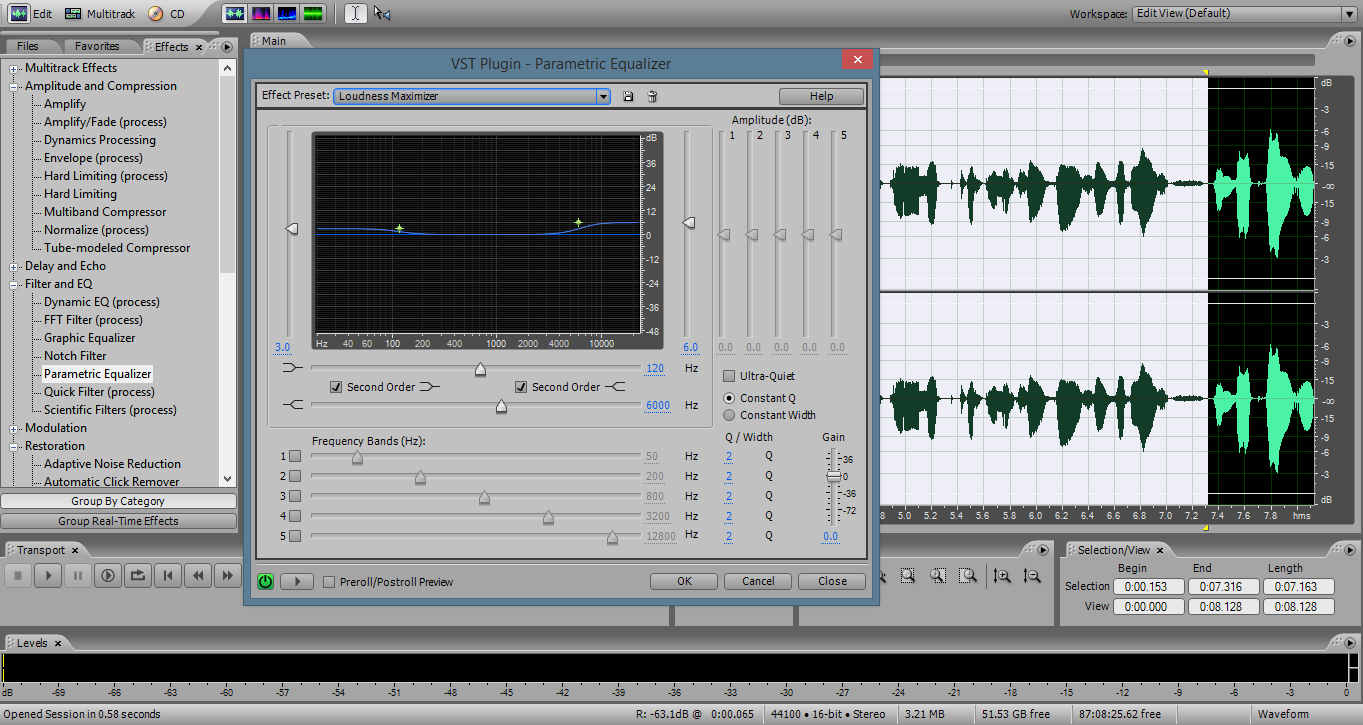
Step 2: Select the entire audio recording and apply equalization. This you can find it in the effects panel of Audition, under “Filter and EQ”. Through EQ, we try to restore some bass (low frequency) and treble (high frequency). You can try out the parametric equalizer as in the screenshot or also the graphic equalizer. The “loudness maximizer” preset is used in this step. You can use a similar one or also tweak the settings a little bit if you feel like it.
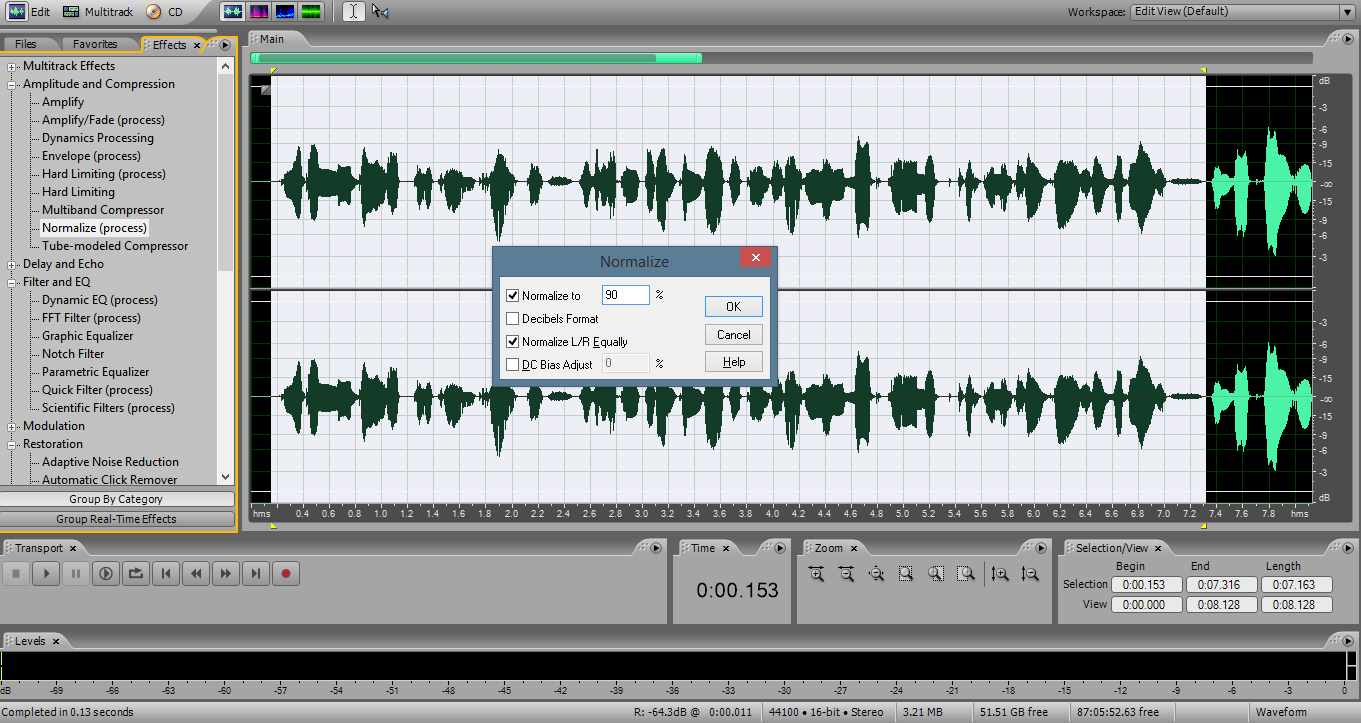
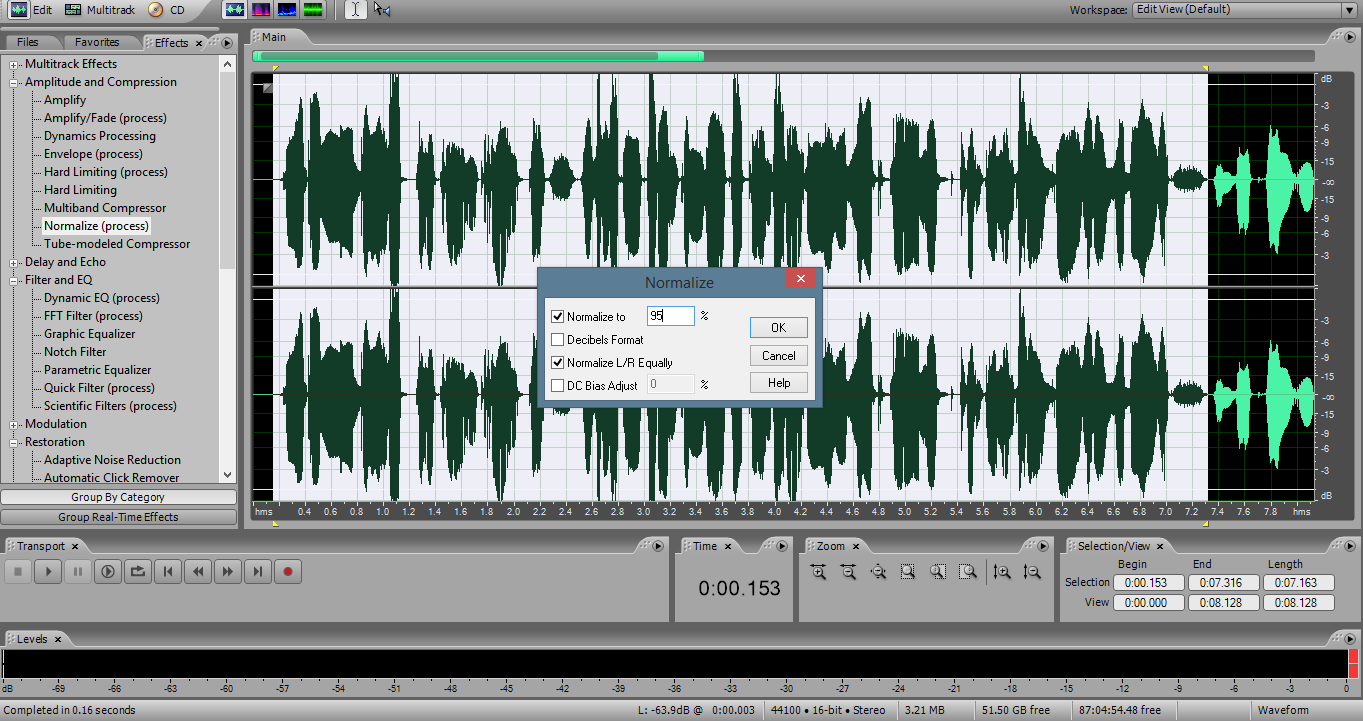
Step 3: Apply normalization. What this does is makes the audio loud to a specific level, without distorting the waveform. This is a much better method to increase loudness compared to the usual volume increase or amplification. In this case, we normalize to 90% (left/right equally, no DC bias). Avoid normalizing to over 90% as this may distort the audio in the compression step (step 4).
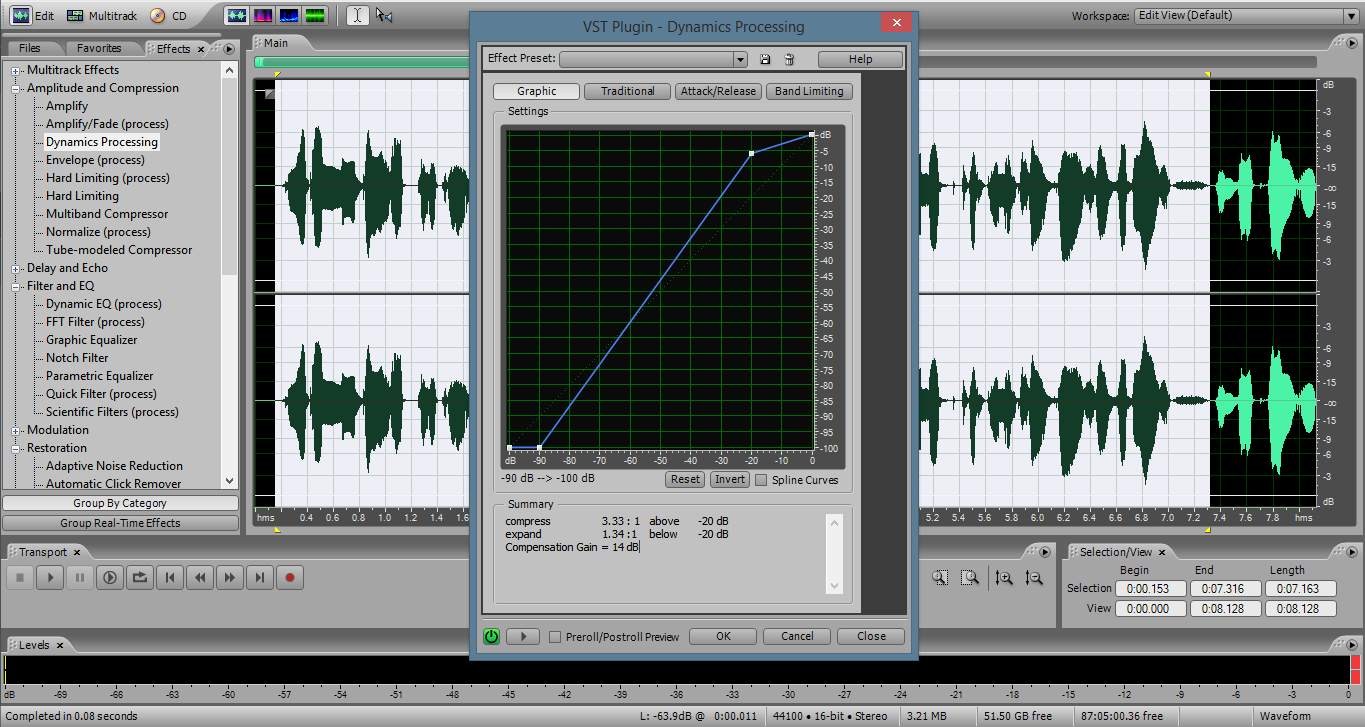
Step 4: Apply compression. In Audition, I have used the Effects > Amplitude and Compression > Dynamics Processing and applied the settings shown in the screenshot that follows this step. You can apply pretty much the same settings using most good audio editing programs. In case you are using Audacity, you can apply these settings by using compression. Again, feel free to tweak the settings to see what suits your voice and microphone hardware best.
Compression is a tool that makes your audio even over the entire duration. If you have been speaking louder at times and softer at some point, it will make the difference less noticeable and comfortable to listen to.
Step 5: Apply normalization again, the same way as you did in step 3. But this time choose normalization level to 95% to have a good loudness to your audio.
Step 6: Save
your work! The software allows you to select a specific part of the soundtrack
to export in your favorite formats. You may want to export it or save it in a
lossless format in case you want to embed the voiceover with a video or process
it later.
The processed and unprocessed audio samples below are
included for your reference. Enjoy better audio and voiceovers for your videos!
|
|
About The Author

Pratik Panda is a professional photographer whose work covers a wide range of subjects and styles. He also enjoys producing written and video tutorials.
His work can be found at his photography
portfolio at Dreamstime.com: Dreamtime Pratik Panda Stock Photos
Recommended For You
Ready To Make Your Dream Documentary?
Sign up for our exclusive 7-day crash course and learn step-by-step how to make a documentary from idea to completed movie!
