Video Lighting Techniques for
Videos and Documentaries
By Guest Blogger: Lorraine Grula
Video Lighting Techniques: When it comes to making videos and documentaries, your lighting makes a bigger difference in the quality of your finished product than what kind of camera you use.
In fact, a cheap camera with great lighting will produce a better looking shot than an expensive camera with terrible lighting. Lots of people think if they get a high quality camera, then all their videos will look great. Not necessarily so.
There's no doubt about it, bad lighting marks a video as the work of an amateur.
So How Do You Get Good Lighting?
It's not hard to get good lighting, even if you do not have any fancy, expensive lighting equipment. This article will explain some basic video lighting techniques so you can best take advantage of your specific situation.
First, realize that to get the best shot, most video cameras need to have a lot of light. Even if a camera is good at getting a shot in low light, adding light will absolutely improve the shot. Even when you want a shot that is supposed to look like it is night, it's best if portions of the shot are brightly lit. Most of the shot can be very dark, black in fact, but small portions should be quite bright. Next time you see a nighttime shot on TV, look closely and you will see that is so.
So,
rule #1 is to have as much light as possible. Sometimes that can be
as easy as opening all the windows and blinds.
Video Lighting Techniques:
Positioning Is Critical
Rule #2 is to make sure that the light is falling on the right places. You want the most important portions of the shot to be brightly lit, even if the entire shot is not.
Imagine for a moment that you are going to videotape a person speaking. You want a fairly close-up shot of them looking straight into the camera. (This is called a talking head shot.) Whatever light you have needs to be falling on their face, NOT behind them. If the majority of the light is behind someone, they will look like a silhouette. You can have a very bright room, but if the light does not fall on their face, then it won't look right. If you watch the video tutorial on this page, you can see a clear demonstration of this.
You can not take a decent talking head shot if someone is standing right in front of a window or has a light fixture behind them. I see that mistake on web videos all the time. Usually, it is a webcam shot and the person and camera are positioned so that the ceiling light fixture is directly behind their head. It looks terrible. The background is way overexposed and their face is in shadow.
This problem is easy to fix. Simply reposition everything so the light falls on their face instead of behind them. Don't stand them directly in front of the window, position them to one side of it.
Switching positions will make all the
difference in the world. You do not necessarily have to change
the lighting at all, rather you change your subject's position and
the camera's position relative to the light.
Video Lighting Techniques:
Direct Light and Diffused Light
There are two basic kinds of light, direct and diffused. Diffused light is much kinder to faces and generally speaking, is the kind you want when you're shooting video.
Light always travels in a straight line. It can bounce, but not bend.
Direct light means the light source is pointed directly at the subject. The light looks harsh. Shadows are dark with straight edges. Think of a bright, sunny day with no clouds.
Diffused light means the light has been bounced or filtered. It looks soft. Shadows are either very light and soft, or nonexistent. The edges of the shadow are fuzzy. Think of a highly overcast day. The clouds are acting as a diffusion filter for the sun. The light rays hit the clouds and bounce around every which way. By the time the light reaches the ground, it is actually coming from every direction all at once. So you have no shadows, or very faint ones. Professional videographers usually prefer to shoot outside on cloudy days if they have a choice.
As with all things, there is a range, or scale. The two extremes would be light that is 100 percent direct, and light that is 100 percent diffused. Then you have everything in between. 20 percent diffused, 70 percent diffused, etc. Diffusion filters and gels that you buy are rated in percentages. If you don't have official diffusion gels or filters, you can use heat resistant waxed paper used in baking. Use one sheet for mild diffusion, fold the sheet over multiple times for increased diffusion. Use clothes pins or metal clasps and place it in front of the bulb.
Unless you're going for a dramatic look, diffused light is almost always the way to go. In a professional light kit, you have gadgets like umbrellas and soft boxes to diffuse the light. If you don't have that stuff, bouncing the light against the wall or ceiling will accomplish the same thing.
Keep in mind that the more you diffuse the light, the less intensity you have. This means if you are bouncing your lights against the ceiling instead of pointing them directly at your subject, (recommended) you might need two lights instead of one to get enough intensity.
Video Lighting Techniques:
Can I Use Home Lighting Fixtures?
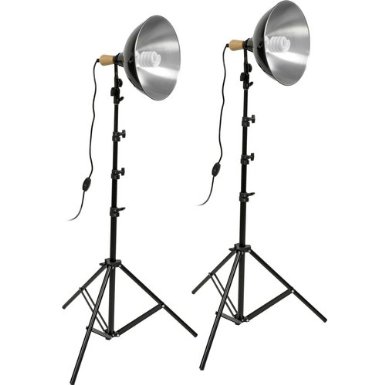
If you do not own professional light fixtures, you can indeed use home lighting fixtures. The same rules about positioning and diffusion apply no matter what fixture you are using.
The two biggest differences between home lighting fixtures and ones made for professional photography are:
- Intensity
- Color Temperature
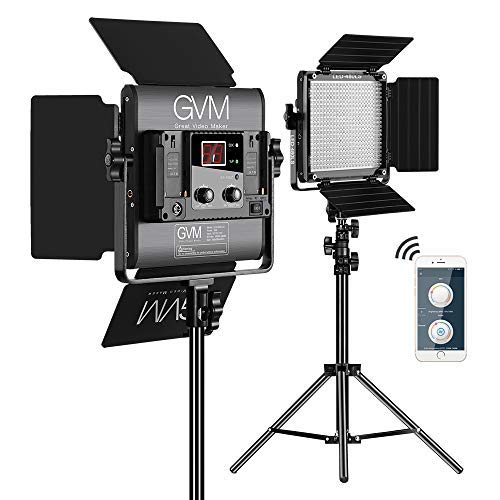
Professional lighting fixtures usually have high wattages. 250 watts is considered a small lamp in a professional light kit, but 250 watts would be huge for a home fixture.
Color temperature is critical for a professional video production, but less so for an amateur. You can probably produce videos that will be fine for the internet without ever worrying about color temperature. In short, color temperature refers to the color of the light. Most light looks white to the eye, but it's not really.
Depending on the source, the light can have a blue tint, green, or orange tint. Sunlight is blue compared to an incandescent light bulb, which looks orange. The color temperature of your lights can affect the color of your shot. Luckily, most modern cameras have a good automatic white balance so will get good color even if you're using mixed light. If your shot looks too blue, too green or too orange, then you probably have a color temperature issue. But chances are high this problem will never crop up.
Remembering these basic video lighting techniques will help you get better quality in your videos!
About The Author:

Lorraine Grula has worked as a video production professional for three decades. She has had the marvelous opportunity of collaborating on thousands and thousands of video news stories, documentaries and informational pieces over her career.
Lorraine enjoys helping others learn the art and science of video production through her blog, Video Production Tips.
Documentary Courses
Ready To Make Your Dream Documentary?
Sign up for our exclusive 7-day crash course and learn step-by-step how to make a documentary from idea to completed movie!
